
- 公開日:
エクセルで網掛けをする方法
エクセルのセルに網掛けをする方法をお伝えします。
また、網掛けの色を変更する方法や、網掛けのカウント方法、解除方法など様々な情報を載せております。
網掛けとは?網掛けと塗りつぶしの違い
エクセルでの網掛けとは、セルの背景にテクスチャ(パターン化された模様)で塗りつぶすことです。
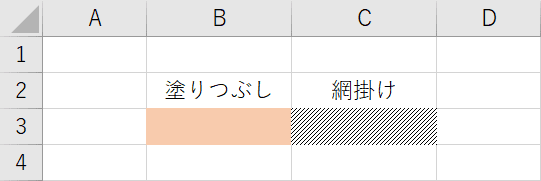
一般的に背景色の塗りつぶしと言われてるのは、単色で色を塗ることを指します。単色で塗る背景色の塗りつぶしを網掛けと言われる方もおります。
網掛けのやり方
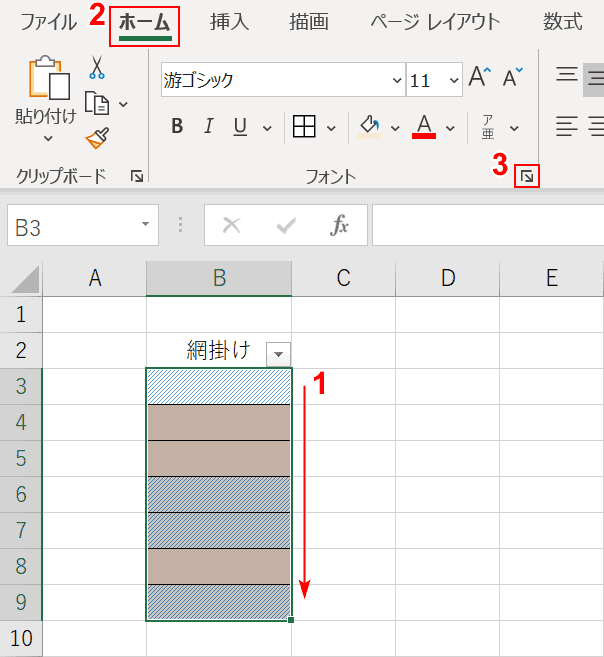
セルの背景を網掛けする方法をご説明します。
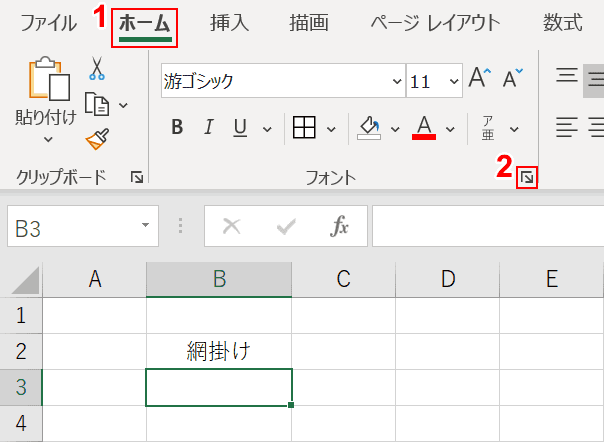
①【ホーム】タブを選択し、②【フォントの設定】を押します。

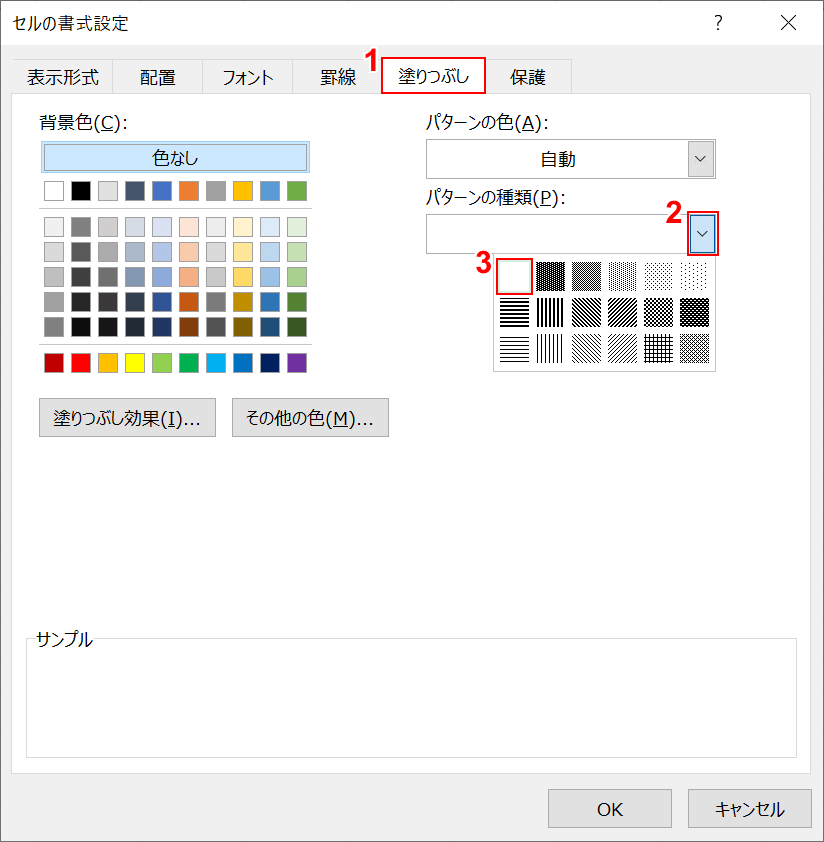
「セルの書式設定」ダイアログボックスが表示されますので、①【塗りつぶし】タブを選択し、②【▼】を押し、③【任意のパターン】を選択します。
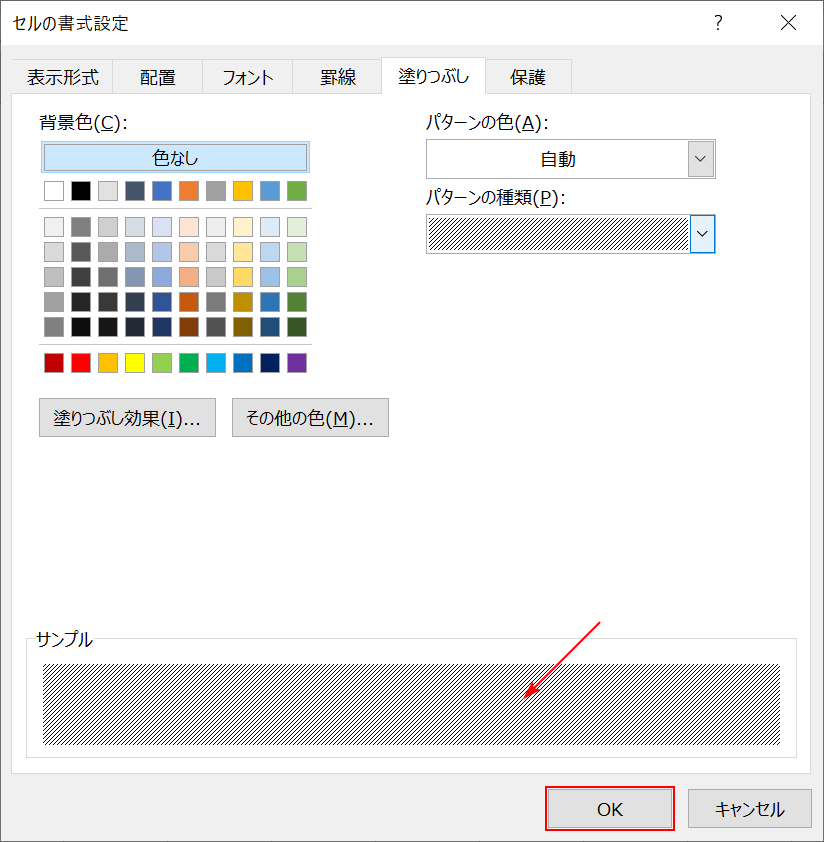
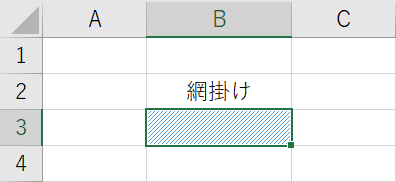
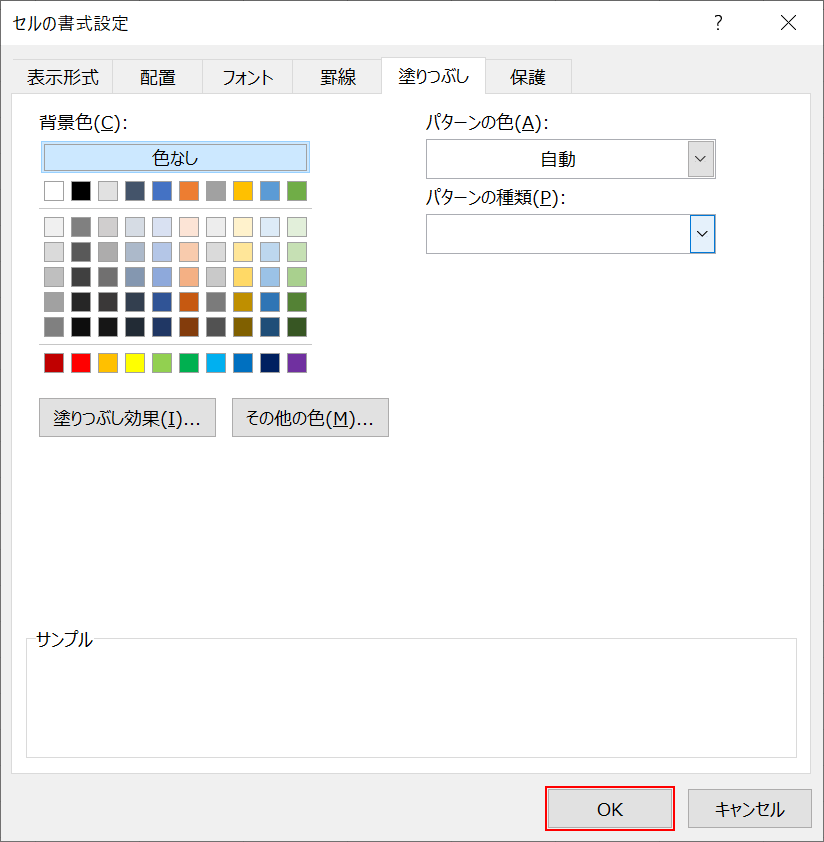
サンプルでパターンを確認し、【OK】ボタンを押します。
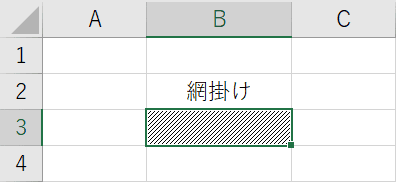
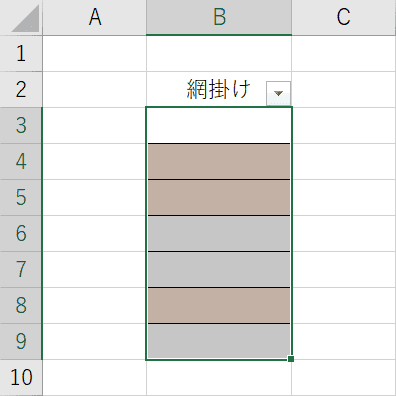
網掛け(パターンで塗りつぶし)が完成しました。
網掛けのショートカット
Ctrl+1で「セルの書式設定」ダイアログボックスを表示することができます。
網掛けの色を変更する
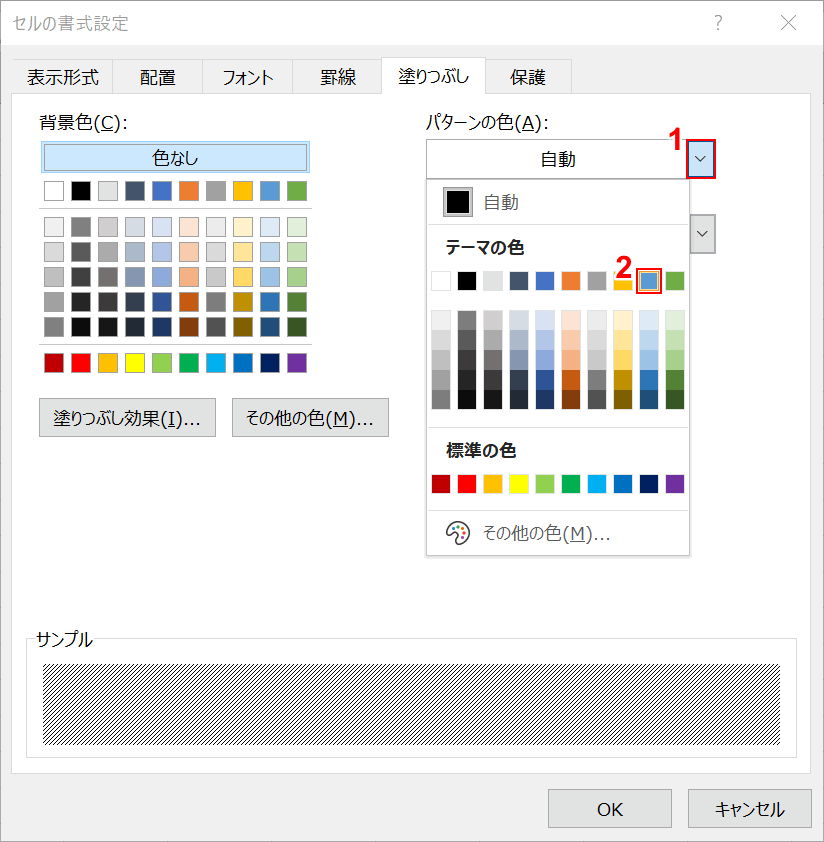
先ほどの「セルの書式設定」ダイアログボックスで色を変更することができます。パターンの色の①【▼】を押して、②【任意の色を選択】します。
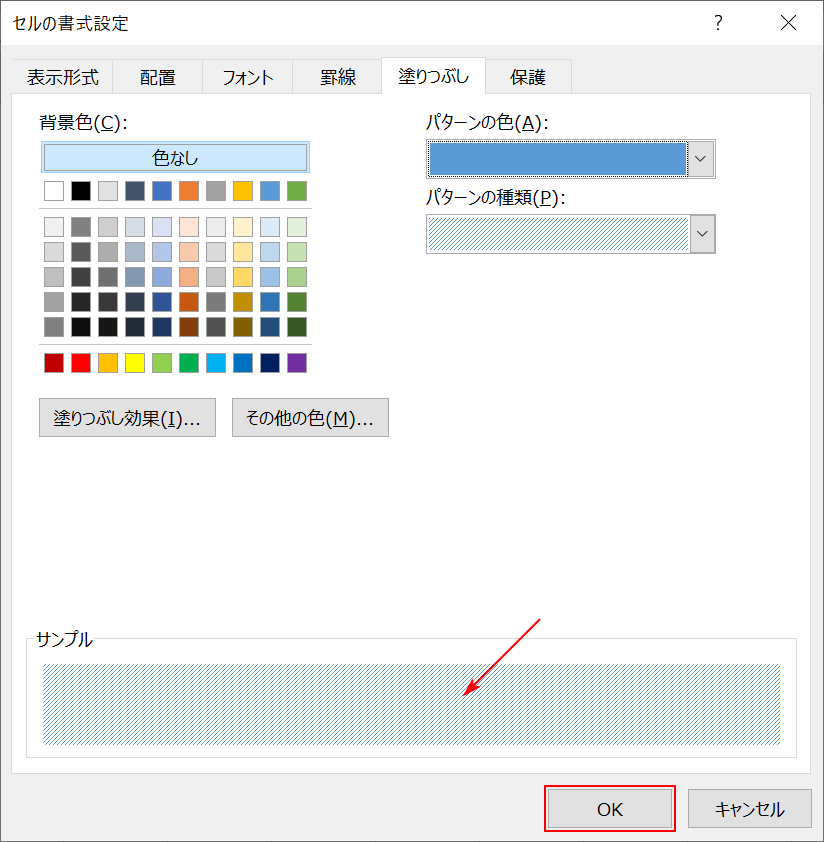
サンプルで色を確認し、【OK】ボタンを押します。
網掛けに色を塗ることができました。
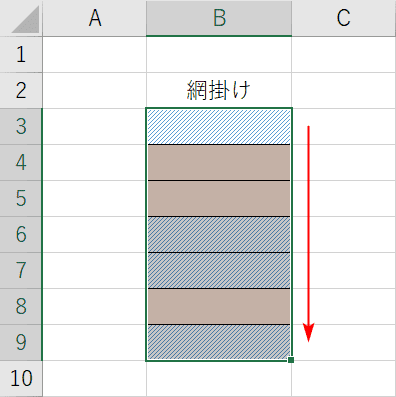
条件を設けて交互に網掛けをする
条件付き書式と関数を利用して、1行ごとに交互に背景色をつけることが可能です。
以下の記事では、単色での塗りつぶしで説明しておりますが、色を選ぶ箇所でパターンを選択すれば、網掛けで1行ごとに塗りつぶすことができます。
網掛けのカウント方法
網掛けをカウントしたい【範囲を選択】し、Ctrl+Fを押します。

「検索と置換」ダイアログボックスが表示されるので、【オプション】ボタンを押します。
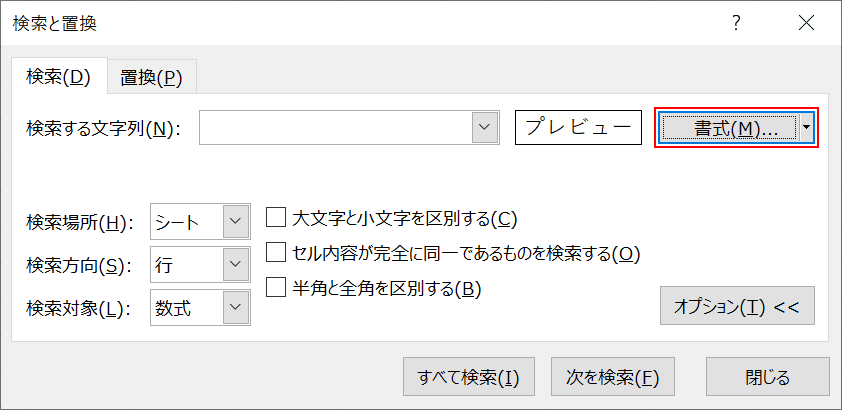
【書式】ボタンを押します。
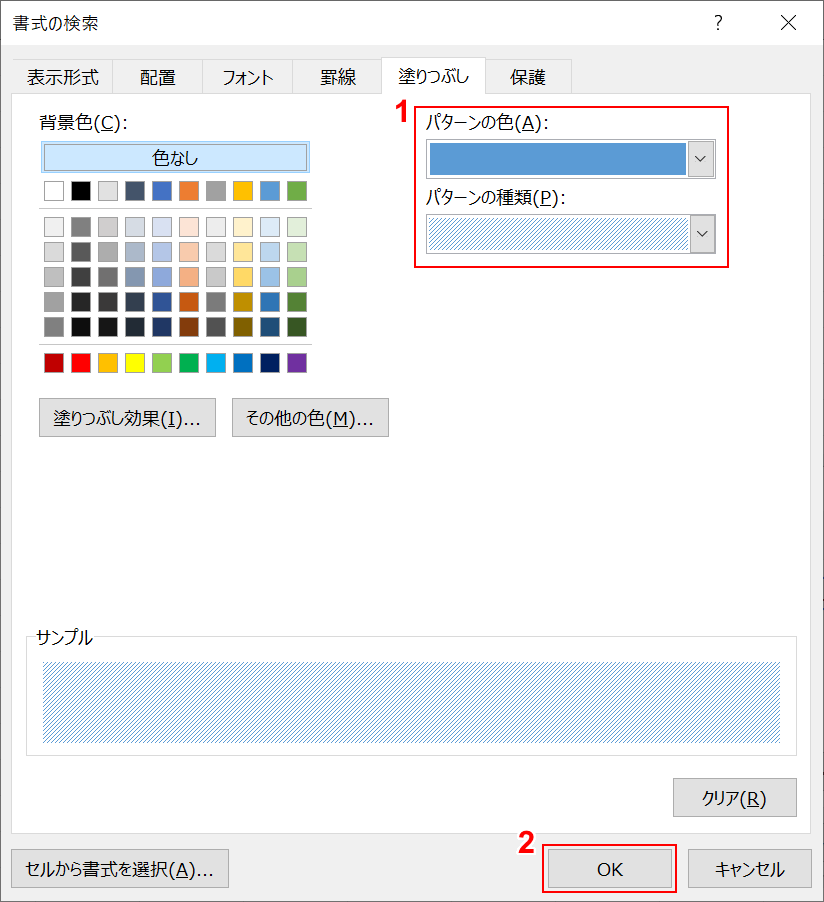
①【検索したい網掛けを設定】し、②【OK】ボタンを押します。
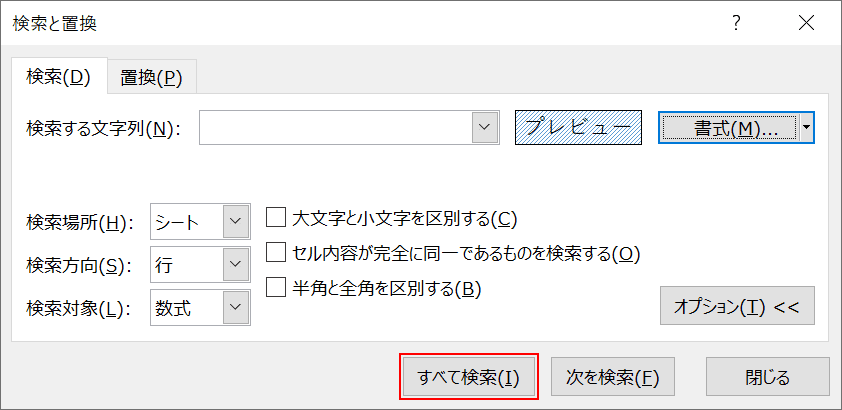
【すべて検索】ボタンを押します。
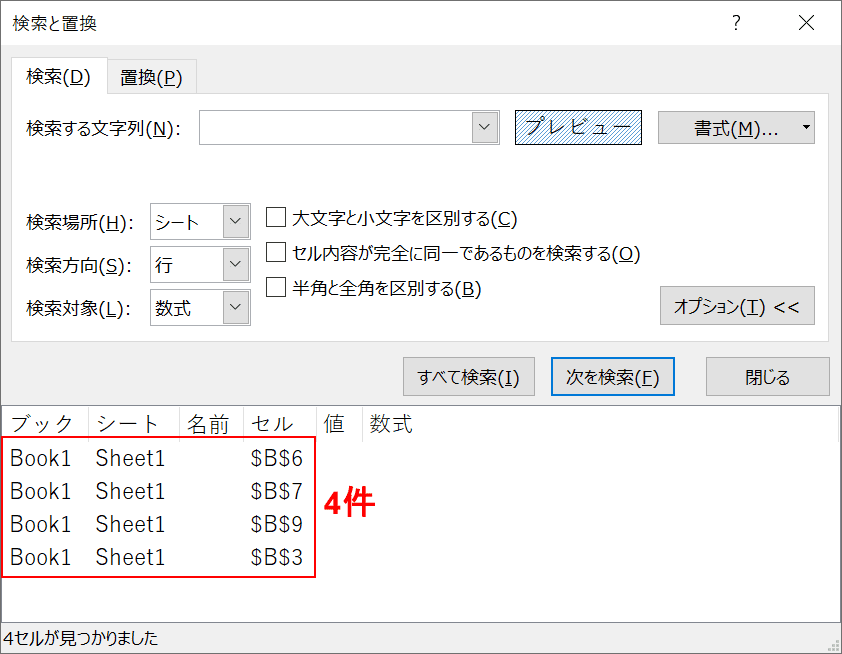
指定した範囲内に、設定した網掛けが抽出されます。
網掛けを解除する方法
①【網掛けを解除する範囲を選択】し、②【ホーム】タブを選択し、③【フォントの設定】を押します。
「セルの書式設定」ダイアログボックスが表示されますので、①【塗りつぶし】タブを選択し、②【▼】を押し、③【一番左上】を選択します。
【OK】ボタンを押します。
網掛けのパターンが解除されました。
Wordのように文字に対して網掛けはできるのか?
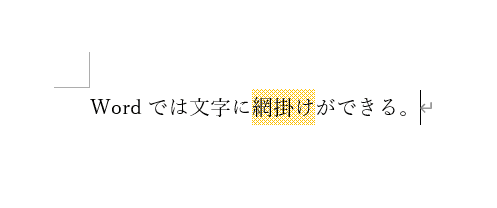
Wordでは上図のように文字に対して網掛けが可能ですが、Excelでは不可能となっております。